Connect Ditto once, and Claude, Codex, Cursor, OpenCode, or another MCP client can use your Ditto memories from the place where you already work. Most clients connect with OAuth — you sign in with your Ditto account and never touch an API key.
Using OpenClaw or Hermes Agent? Those integrations use the Ditto CLI, not MCP. Start with OpenClaw or Hermes Agent.
After connecting, add the daily memory workflow instruction so your assistant knows when to recall context, save a meaningful checkpoint, and leave trivial details out.
Endpoint
https://api.heyditto.ai/mcpOne Streamable HTTP endpoint for every client. (The legacy SSE endpoints /mcp/sse and /mcp/message still work for older clients.)
Pick Your Tool
OAuth, no API key
Claude.ai
Add Ditto as a remote custom connector. OAuth handles sign-in, so there is no key to manage.
Dittohttps://api.heyditto.ai/mcpOAuth- Open Claude.ai Settings → Connectors.
- Choose Add custom connector.
- Paste the Ditto MCP URL and complete the Ditto sign-in flow.
OAuth, no API key
Claude Desktop
Add Ditto as a remote custom connector, same as Claude.ai. Keep the JSON config only for older local setups.
Dittohttps://api.heyditto.ai/mcpOAuth- Open Claude Desktop Settings → Connectors.
- Add a custom connector named Ditto.
- Paste the Ditto MCP URL and sign in with OAuth.
Advanced: local JSON config
Config file locations: ~/Library/Application Support/Claude/claude_desktop_config.json on macOS and %APPDATA%\Claude\claude_desktop_config.json on Windows.
{
  "mcpServers": {
    "ditto": {
      "url": "https://api.heyditto.ai/mcp",
      "headers": {
        "Authorization": "Bearer YOUR_API_KEY"
      }
    }
  }
}
Terminal setup, OAuth sign-in
Claude Code
Add Ditto as an HTTP MCP server, then authenticate with OAuth from inside Claude Code.
claude mcp add --transport http ditto https://api.heyditto.ai/mcp- Run the command in the project where you use Claude Code.
- Open Claude Code and run
/mcp. - Choose Ditto and complete the browser OAuth flow.
Advanced: API key command
claude mcp add --transport http ditto https://api.heyditto.ai/mcp \
--header "Authorization: Bearer YOUR_API_KEY"OAuth, shared with the IDE extension
Codex CLI
Register Ditto once and sign in with OAuth. The CLI, IDE extension, and desktop app share MCP config on the same Codex host.
codex mcp add ditto --url https://api.heyditto.ai/mcp
codex mcp login ditto
codex mcp list- Register Ditto with
mcp add, then runmcp login dittoto start browser sign-in. - Confirm
dittoappears incodex mcp list. - If you previously registered with a bearer token, run
codex mcp remove dittofirst — Codex skips OAuth when an Authorization header is already configured.
Advanced: bearer-token fallback
export DITTO_MCP_API_KEY="YOUR_API_KEY"
codex mcp add --url https://api.heyditto.ai/mcp \
  --bearer-token-env-var DITTO_MCP_API_KEY ditto
OAuth, shared with CLI and IDE
Codex App
Add Ditto's URL and authenticate with OAuth. The app shares MCP configuration with the CLI and IDE extension on the same host. An API key is an optional fallback.
DittoStreamable HTTPhttps://api.heyditto.ai/mcpOAuth- Open Codex settings with
Cmd+,. - Choose Integrations & MCP, then add a custom MCP server named Ditto.
- Select Streamable HTTP, paste the URL, and save.
- Select Authenticate when sign-in is required, then complete Ditto sign-in in your browser.
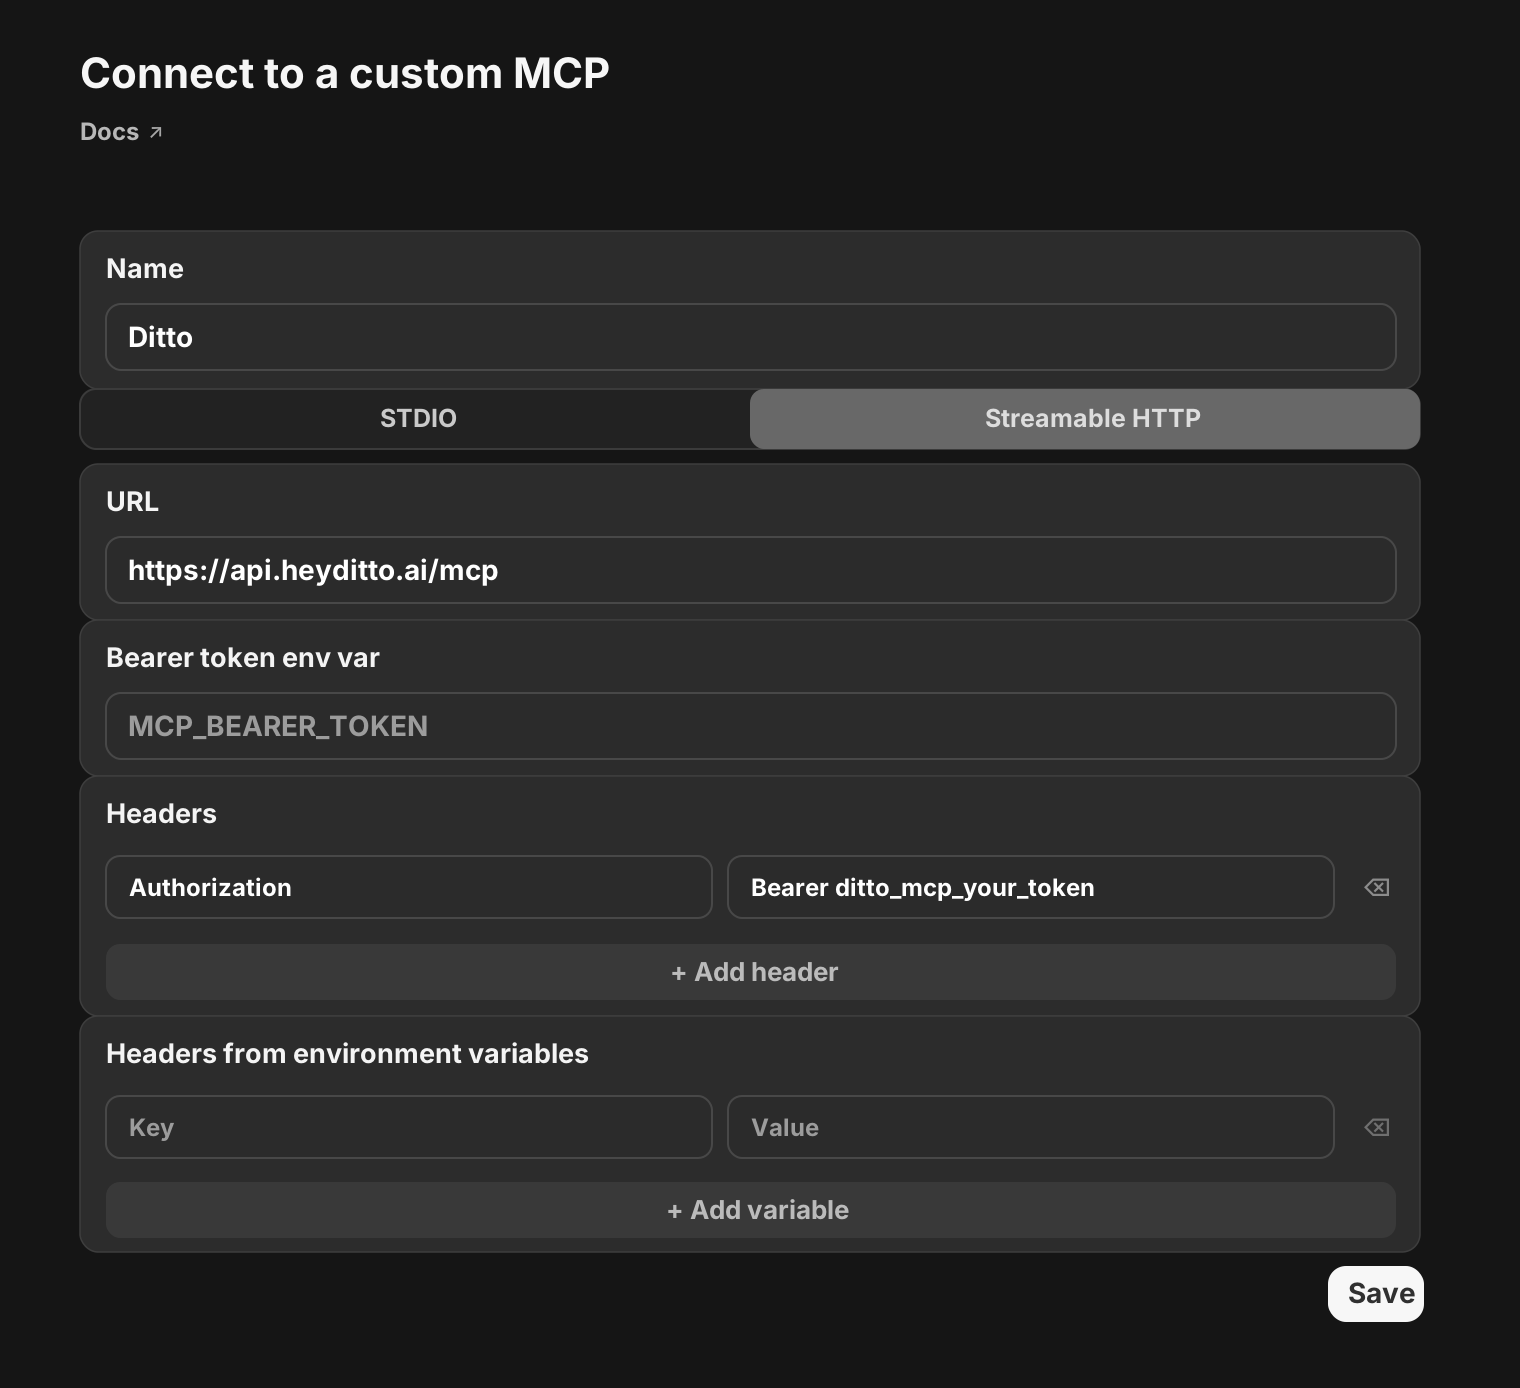
Advanced: API-key fallback
Create a separate key for Codex and configure an Authorization header locally. The following image illustrates the optional key-based setup.
Interactive setup, OAuth sign-in
OpenCode
Register Ditto with the interactive mcp add prompts, then authenticate with OAuth.
opencode mcp add
# When prompted: Name: ditto · Type: Remote (SSE) · URL: https://api.heyditto.ai/mcp
opencode mcp auth ditto
opencode mcp list- Run
opencode mcp addand follow the prompts. - Run
opencode mcp auth dittoto sign in with OAuth. - Confirm Ditto appears in
opencode mcp list.
Remote MCP server
Cursor
Add Ditto as a remote MCP server and authenticate with OAuth when Cursor prompts.
{
  "mcpServers": {
    "ditto": {
      "url": "https://api.heyditto.ai/mcp"
    }
  }
}- Open Cursor Settings → MCP, or edit
~/.cursor/mcp.json. - Add a remote MCP server named ditto.
- Authenticate when Cursor prompts, then restart Cursor if the server does not appear.
Advanced: API key JSON
{
  "mcpServers": {
    "ditto": {
      "url": "https://api.heyditto.ai/mcp",
      "headers": {
        "Authorization": "Bearer YOUR_API_KEY"
      }
    }
  }
}
Uses serverUrl
Antigravity
Antigravity's MCP config uses serverUrl for remote servers. The endpoint and Authorization header stay the same.
{
  "mcpServers": {
    "ditto": {
      "serverUrl": "https://api.heyditto.ai/mcp",
      "headers": {
        "Authorization": "Bearer YOUR_API_KEY"
      }
    }
  }
}- Open
~/.gemini/antigravity/mcp_config.json. - Paste the JSON block above.
- Restart Antigravity.
Authentication
OAuth is the default for Claude.ai, Claude Desktop, Claude Code, Codex CLI, OpenCode, and Cursor. Your client opens a browser sign-in, and no credentials live in config files.
API keys cover the rest — local JSON/TOML configs and clients without OAuth support. Create one at app.heyditto.ai/mcp, copy it immediately (it’s shown once), and use it as an Authorization: Bearer <key> header. Create a separate key per tool so revoking one doesn’t break the others, and never commit keys to git.
What your client can do
Once connected, your client can search your memories and subjects, fetch full conversations, explore how memories relate to each other, and save new memories from wherever you’re working. You don’t need to learn the tool names — MCP clients discover them automatically.
Troubleshooting
“Not Authenticated” — check the key for typos or extra spaces, confirm the header format is Authorization: Bearer YOUR_API_KEY, make sure the key wasn’t revoked, and restart the client after changing config.
Empty search results — memories come from your Ditto conversations, so an empty account returns nothing. Try broader search terms, and check the client is actually calling Ditto.
OAuth flow fails — log into Ditto in your browser first, allow pop-ups, and retry in an incognito window if it still hangs.